
Showing posts with label Recipes. Show all posts
Showing posts with label Recipes. Show all posts
Monday, January 27, 2014
Ms. Mercury's Vintage Cocktail Party
Tuesday, November 20, 2012
What's for Dinner? Fritatta!
I love this dinner, as it works well when there is hardly anything left in the cupboard, Sunday brunch, or anytime really. Use up eggs when they are getting close to expiration with this dish. It serves four and there are never any leftovers when this is served. The thyme compliments the potatoes, and the cheese makes the eggs creamy!
Enjoy!

Potato & Onion Frittata
1 large (yellow or red) onion, chopped
1 tsp each, minced fresh thyme and rosemary (if dried, use 1/2 tsp.)
2 garlic cloves, minced
1 lb. red potatoes (gold will work too) thinly sliced
12 eggs
2/3 cup milk
1/2 tsp. pepper
1 tsp. salt
1/2 cup Parmesan, Gruyere, Bellavitano or any cheese you have on hand (shredded)
5 Tbsp. butter, divided
Preheat oven to 350 degrees.
In an oven-proof large skillet, saute onion, rosemary, and thyme in 1 Tbsp. of butter. Cook over medium heat until tender, then add garlic and cook one minute being careful not to burn the garlic. Remove from pan and add 4 Tbsp. butter. Cook potatoes, turning occasionally, until tender. In another bowl, whisk together eggs, milk, salt and pepper. When onions are cooled, stir into egg mixture and add cheese. Pour egg mixture over potatoes and put in oven for 20-30 minutes or until eggs are very nearly set. Remove from oven and let cool for 5 minutes. Cut into wedges.
Quick, dress some greens with red wine vinaigrette and top your frittata. Don't forget to sprinkle a little extra cheese on top. *wink*

One last tip- If you have time ahead, you can prep the onions, garlic, herbs, cheese( if not already shredded), even the potatoes (slice and place in a bowl of water in the fridge, then drain before use) to save you some time on this dish.
Enjoy!

Potato & Onion Frittata
1 large (yellow or red) onion, chopped
1 tsp each, minced fresh thyme and rosemary (if dried, use 1/2 tsp.)
2 garlic cloves, minced
1 lb. red potatoes (gold will work too) thinly sliced
12 eggs
2/3 cup milk
1/2 tsp. pepper
1 tsp. salt
1/2 cup Parmesan, Gruyere, Bellavitano or any cheese you have on hand (shredded)
5 Tbsp. butter, divided
Preheat oven to 350 degrees.
In an oven-proof large skillet, saute onion, rosemary, and thyme in 1 Tbsp. of butter. Cook over medium heat until tender, then add garlic and cook one minute being careful not to burn the garlic. Remove from pan and add 4 Tbsp. butter. Cook potatoes, turning occasionally, until tender. In another bowl, whisk together eggs, milk, salt and pepper. When onions are cooled, stir into egg mixture and add cheese. Pour egg mixture over potatoes and put in oven for 20-30 minutes or until eggs are very nearly set. Remove from oven and let cool for 5 minutes. Cut into wedges.
Wait! Your mother in law is coming over?!
Quick, dress some greens with red wine vinaigrette and top your frittata. Don't forget to sprinkle a little extra cheese on top. *wink*

One last tip- If you have time ahead, you can prep the onions, garlic, herbs, cheese( if not already shredded), even the potatoes (slice and place in a bowl of water in the fridge, then drain before use) to save you some time on this dish.
Monday, November 12, 2012
Pie Crust 101

"We must have a pie. Stress cannot exist in the presence of pie."
~ David Mamet, from his 1999 play, Boston Marriage

Since all of us were at different skill levels of pie making, we decided to bake two classic apple pies. That would give us all lots of practice rolling out a crust.

Jennie was our designated apple peeler.

Rebecca worked her lattice magic on one pie while Wild Cat did the HVG cutouts shown in the top photo.
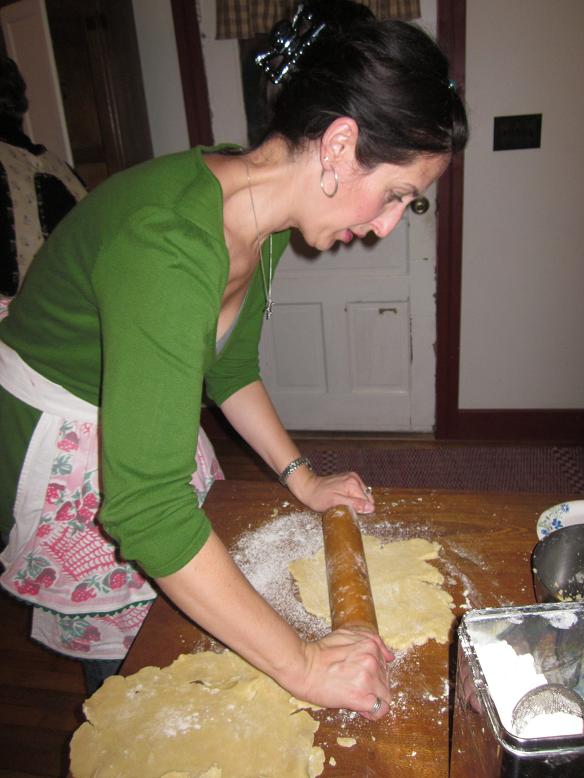
Sherry mastered the proper wrist action on the rolling pin for our next dessert...

...a Chocolate Pecan Tart. How can you have a girls' day out and not have something chocolate? This beauty was baking while we cleaned up the kitchen and headed for the dining room.
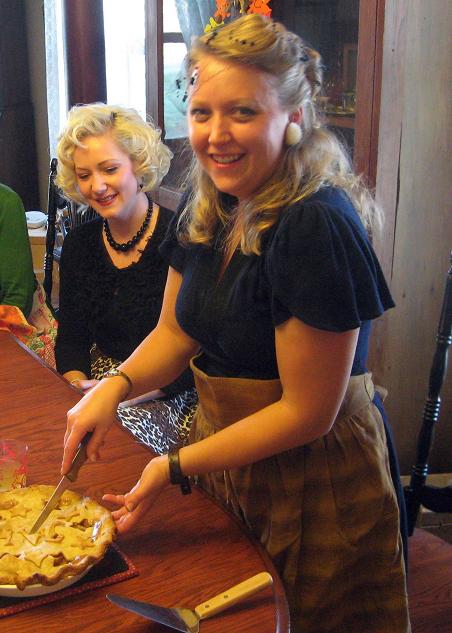
Success!

And these are the satisfied smiles of an afternoon well spent. This holiday season we will proudly present our families with homemade flakiness and perfectly sweetened apples. For more photos and all the recipes, head over to our facebook album. Happy Baking!
P.S. Don't let all those aprons fool you. We didn't spend all afternoon slaving over the hot stove. Jennie treated us to a vintage clothing swap, and we even found time to visit the sheep.
Monday, November 5, 2012
Government Issue KP Apron (almost)
 |
| KP - "kitchen police" |

Well, several years ago I found a half apron at the thrift store with a "Permanent KP" pocket on the front. I took the pocket off and remade it into a more utilitarian apron for my younger brother. He recently bought his first house, and this seemed like the perfect housewarming gift.
Now I've made a few aprons in my day, but this had to be the easiest one yet. Since it was for a guy, I was immediately relieved of having to bother with any froufrou ruffles and decorations. I was aiming for the basic cafe apron.

I bought 2/3 of a yard of cotton duck. Cut out a rectangle 24" W x 36" L. Folded it in half and eye-balled the side curve along the chest to shape the top bib of the apron. I hemmed the top edge of the bib, the straight side edges and bottom hem. Then I sewed on the KP pocket.

Along the two curved sides, I turned a 3/4 inch casing. Through that I ran a length of rope (how can you get more masculine?). The rope extends from the back waist, up thru the side, around the back of the neck, down the other side and around to tie in the back. This one continuous piece allows for the neck to be adjusted to any length or size. I'm sure this technique is not new, but I first came across it at a Pampered Chef party.

My brother laughed when he saw this. It's always fun to be reminded of something from the past that then seemed simply torturous, but now seems so routine. He'll probably never wear it, but that's okay. It was a good trial run, and I'm sure I'll be using this technique in other aprons. Other aprons with more froufrou and ruffles, of course.
Friday, October 26, 2012
Healthy Halloween Snacks
Just a quick post on our little kitchen project from last night. My daughter and I put together two healthy snacks for her Halloween Party at school today. Her teacher requested no sweets so I spent some time online looking for ideas that could (1) handle the bus ride to school in the morning, (2) be easily passed out to 23 children, and (3) didn't require a Master Chef. These two were fun and easy.


We made beetles using black olives, cream cheese and crackers.

And string cheese ghosts with sunflower seed eyes.
Other good ideas can be found here (I especially like the watermelon brain!).
Happy Halloween Everyone!
Friday, September 21, 2012
Homemade Chai Tea
 |
| Alphonse Mucha |
Now that the weather has turned cooler, I find myself visiting the coffee pot a lot more frequently. I barely get through the morning's housework before the thoughts of a warm cup, a good book and a wool blanket fill my head. Here's a recipe I found several years ago to add a little spice to your afternoon coffee break.
Chai Tea
1 cup powdered dry milk
1 cup powdered creamer
1 cup French Vanilla powdered creamer
1 cup white sugar
1 cup brown sugar
2 cups unsweetened instant tea
2 teas. ginger & cinnamon
1 teas. cloves & nutmeg
Mix well and store in airtight container. It's just that simple. And is the perfect pick-me-up when paired with gingerbread or molasses cookies. Let go of the guilt; the laundry can wait.
Wednesday, May 9, 2012
24 Tips on Food-Saving
I love Better Homes & Gardens. I stare longingly at those pictures of beautiful homes I will never live in, and when that's not enough, I go to the garden pages.....ahhh.
Back to reality.
There is a good amount of practical tips in this magazine which I suppose keeps us coming back for more torture each month. I was just flipping through the latest edition, okay, so it's from 1943, but it could be last months copy, and you might not know the difference, Well the 15 cent price on the front does give it away, but the advice can still be very current. This issue has 24 tips on food saving.

One tip to save drippings or grease is already in use, thanks to my "new" vintage GREASE canister from my mother.

I also already combine the last little bits of cereal into one bowl to make a full serving. Cereal is WAY too expensive in my book to be throwing out. Turning bottles upside down to get the last bit and turning dried-up bread into bread crumbs are familiar routine in my kitchen, but there were a few new tips. Do you eat Cream of Wheat or grits? Is there some leftover? If so, save in a rinsed out glass and chill. Unmold cereal and slice into rings to fry for tomorrows breakfast. I must admit this sounds good to me, especially with a little marinara on top and Parmesan cheese. You could even fry it in some of your reserved drippings!
I love making lemon meringue pie but hate throwing away yolks, seems like such a waste. Sometimes I save them and throw an extra yolk in to my scrambled eggs. Another tip recommends covering them with cold water and storing in the fridge. Then poaching them for ten minutes and putting them through a coarse sieve. Use them to top salads, in sandwich filling or creamed dishes. More possibilities are floating through my mind.
Some of the best food saving tips I use start before you go to the grocery store. I make out a menu plan/grocery list for two weeks at a time. This enables me to see where I can use a item in multiple dishes, and disguise leftovers in the next days lunch. It also enables me to write down exactly how much I need of an item, perhaps buying those black sesame seeds in bulk is cheaper when you only need a tablespoon.
Starting a compost pile has given me the most gratification knowing that even the inedible parts of my produce will go towards growing new beautiful food in my garden.
I also try to tackle things I can never seem to use completely, tomato paste is my favorite. As small as those cans are you rarely use the whole can in a recipe, so I have begun portioning out the remainders a tablespoon at a time and freezing it. This saves time and money. Are there any leftovers you use up in a favorite way? Do you have a grocery list you use? Let us know, we're always looking for a good tip.
Recommended books:
Make it Fast Cook it Slow by Stephanie o'Dea
Family Feasts for $75 a Week by Mary Ostyn
Back to reality.
There is a good amount of practical tips in this magazine which I suppose keeps us coming back for more torture each month. I was just flipping through the latest edition, okay, so it's from 1943, but it could be last months copy, and you might not know the difference, Well the 15 cent price on the front does give it away, but the advice can still be very current. This issue has 24 tips on food saving.

One tip to save drippings or grease is already in use, thanks to my "new" vintage GREASE canister from my mother.

I also already combine the last little bits of cereal into one bowl to make a full serving. Cereal is WAY too expensive in my book to be throwing out. Turning bottles upside down to get the last bit and turning dried-up bread into bread crumbs are familiar routine in my kitchen, but there were a few new tips. Do you eat Cream of Wheat or grits? Is there some leftover? If so, save in a rinsed out glass and chill. Unmold cereal and slice into rings to fry for tomorrows breakfast. I must admit this sounds good to me, especially with a little marinara on top and Parmesan cheese. You could even fry it in some of your reserved drippings!
I love making lemon meringue pie but hate throwing away yolks, seems like such a waste. Sometimes I save them and throw an extra yolk in to my scrambled eggs. Another tip recommends covering them with cold water and storing in the fridge. Then poaching them for ten minutes and putting them through a coarse sieve. Use them to top salads, in sandwich filling or creamed dishes. More possibilities are floating through my mind.
Some of the best food saving tips I use start before you go to the grocery store. I make out a menu plan/grocery list for two weeks at a time. This enables me to see where I can use a item in multiple dishes, and disguise leftovers in the next days lunch. It also enables me to write down exactly how much I need of an item, perhaps buying those black sesame seeds in bulk is cheaper when you only need a tablespoon.
Starting a compost pile has given me the most gratification knowing that even the inedible parts of my produce will go towards growing new beautiful food in my garden.
I also try to tackle things I can never seem to use completely, tomato paste is my favorite. As small as those cans are you rarely use the whole can in a recipe, so I have begun portioning out the remainders a tablespoon at a time and freezing it. This saves time and money. Are there any leftovers you use up in a favorite way? Do you have a grocery list you use? Let us know, we're always looking for a good tip.
Recommended books:
Make it Fast Cook it Slow by Stephanie o'Dea
Family Feasts for $75 a Week by Mary Ostyn
Thursday, April 26, 2012
This Little Lamb of Mine
Before, during and after the Easter season, I am on the prowl for all things 'lamb.' Every time I enter a store, my eyes are peeled for collectibles, cards and stationery, stuffed animals, whatever. Lambs and sheep are not as easy to come by as, say, cows or chickens. Apparently only 'real' farmers raise cows while the lowly lamb just stands quietly by. So if I can wade through the bins of rabbits and ducks, sometimes, just sometimes, I'll find an adorable Easter lamb collectible.
Right there, behind the cold glass door, standing quietly by in the refrigerator case at the local grocery was the most precious lamb butter I had ever seen! Actually, it's the only lamb butter I've ever seen. How long have these been on the market, anyways? Without a thought at the *gulp* $2.50 price tag (for barely a 1/4 pound!), I tossed the little guy in my cart. He graced the table for our Easter dinner and made those rolls taste all the better!
 I made certain to keep the molded plastic that he came in. I knew this was where my $2.50 investment would really pay off!
 Using this easy-peasy fudge recipe from Rachel Ray (she was on Oprah one day), I carefully re-filled the mold after letting the chocolate cool a bit.
And a new chocolate lamb was born! How freakin' cute is he! He's been shuffled around in my fridge for a few days now; I just can't bring myself to eat him. What else can I pour in that mold? Ice cream? Jello?! I could make a Jiggler Lamb?!?!
This year I found butter.
 |
| Yes, that's a plate of roast lamb behind the butter. |

 |
| No, he's not sitting in a soap dish... |
Sunday, February 26, 2012
The Coconut Cake Experience
I love coconut! Coconut yogurt, cookies, pudding, pie, candy bars, curry, pina` colada's, syrup, you name it, I love it with coconut. Despite my love, I have been intimidated by the coconut cake. I have been drooling over the recipe posted on Martha Stewart, but cannot bring myself to make a cake with 10 sticks of butter! I would undoubtedly love it and then have to try to resist eating the whole thing. I found a recipe in a magazine that only required 2 sticks of butter. It also called for fresh coconut so knew I had to try it. Splitting this recipe over two days made it easier to make during the week. The first night I made the cake, cracked open the coconut, and ate a quarter of the coconut. The next evening I made the frosting and assembled the cake.
The cake was very good, I was impressed.
The frosting however was too sweet for me. It was a meringue frosting that tasted like marshmallow cream. I would have preferred buttercream for two reasons, one taste, and two ease of frosting. Buttercream sets up nicely and gives that snowy white, crumb free look. I believe this qualifies as an experience and next time I make a coconut cake, with my tweaks and adjustments, it is sure to be a hit!
 |
Using my cake leveler, I leveled the cake and then cut it into two.   |
 |
| Toasted coconut shavings for the top complete this cake. |
Friday, February 3, 2012
Beer Bread
I must confess that while my mom can whip up four loaves of made-from-scratch bread like nobody's business, I do not have that skill. I love my bread machine. This recipe is just as easy, but feels more satisfying. Mom clipped this from a local newspaper and excitedly gave it to me saying, "Hank will love this! It's like a doorstop!" She knows my husband likes dense, sourdough breads, but I promise you this isn't really doorstop fodder. Leave that to the fruitcakes.

Having made this just before supper, I was too hungry to snap a picture before we sat down. This is what was left. Who can resist warm bread? Anyways, this is how to do it.
3 1/2 cups flour
3 Tbs sugar
1 Tb baking powder
1 1/2 tsp salt
12 ounces beer
Mix flour, sugar, baking powder and salt. Add beer and stir until just combined. Turn dough onto floured surface and knead to form a ball. Place bread on greased cookie sheet and confidently slash an X on top with serrated knife. Brush with egg (optional). Bake in 375 oven for 45 minutes until golden brown.
It is a heavier, cottage bread and best eaten the first day. But how can you not try this? It's too easy!

Having made this just before supper, I was too hungry to snap a picture before we sat down. This is what was left. Who can resist warm bread? Anyways, this is how to do it.
3 1/2 cups flour
3 Tbs sugar
1 Tb baking powder
1 1/2 tsp salt
12 ounces beer
Mix flour, sugar, baking powder and salt. Add beer and stir until just combined. Turn dough onto floured surface and knead to form a ball. Place bread on greased cookie sheet and confidently slash an X on top with serrated knife. Brush with egg (optional). Bake in 375 oven for 45 minutes until golden brown.
It is a heavier, cottage bread and best eaten the first day. But how can you not try this? It's too easy!
Wednesday, December 28, 2011
Cream Cheese Spritz Cookies

1 C shortening
8 oz cream cheese
1 C sugar
1 teas vanilla
3 1/2 C flour
Combine all ingredients in order listed. Add food coloring to tint before adding flour. Fill cookie press and drop on ungreased cookie sheet. Decorate with sprinkles, colored sugar or red hots as desired. Bake 375degrees for 8-10 minutes.

Betcha can't eat just one! (or six, for that matter)
Friday, November 4, 2011
The last of the year's preserving
I really don't know where October went. I just remember summer, in fact I just put the kids slip-n-slide away this week. Wow! I have been busy! So it was to my surprise that my parsley was still green and fresh, despite the hard frosts in the garden. I harvested what I hope to be a full winter's supply.
 |
| Plenty of parsley left in the garden |
I chopped most of it fine in my food processor with a little olive oil and pressed it into an ice cube tray to freeze. This will be great for winter's meals.The rest was for parsley jelly. I know, it sounds intriguing, no? Okay maybe not to some but I'm convinced that if you add enough sugar to anything it will taste good. Upon reading this recipe I wondered, what do you eat parsley jelly with? Suggestions were the usual, toast, breads, etc. but there was also a suggestion of meat. Hhhmmm....
So the recipe is pretty simple and you can find several variations on the web. Soaking the parsley in boiling water and then using the strained liquid is the first step. Then adding your sure-jell and sweetener is next. I did use a bit of green food coloring since the liquid is a very faint green. |
| My boiling green jelly |
 |
| The "fruit" of my labor. |
Tonight's dinner was shredded BBQ beef, garlic ciabatta bread, and peas. I decided to be brave and try my jelly on my bread with the beef on top AND.........
It was really good!
In my mouth was a sweet and savory flavor burst (my favorite) with the freshness of the parsley cutting through. It is not overly strong but rather a nice compliment to the meat. Test batch passed, so I will be stocking up on english muffins. I always enjoy discovering something new and tasty, especially one that makes use of an overabundance. Now to put away the last of my canning supplies, crack open the canned jewels from summer, and roll out the winter projects.
Thursday, September 29, 2011
Canning: Alien Guts
This is my second year at canning alien guts. Last year I was determined to do it just for the sheer novelty of it, and it went over well . . . well, with my husband anyway. The kids took one look at the green, jellied mass and promptly declared they would not be eating those "alien guts."
 And of course I'm referring to green tomato preserves. But if anyone knows where they sell alien guts, you could probably make a fortune on that! Preserves is a product defined as "a mixture of fruit with an equal amount of sugar." No wonder this stuff tastes good! I used my 1955 Kerr canning book for this recipe as my "new" 1967 Ball book didn't have it.

Chop the tomatoes into cubes, cover with hot water and boil for 5 minutes. Drain, add sugar and let sit for at least 3 hours.
 Drain off syrup and boil rapidly until it spins a thread. Add tomatoes and chopped lemons. Boil until thick and clear (about 10 minutes).
 Pack in KERR (the name is printed in capitals throughout the entire
cookbook, just in case you forgot which jar brand is the BEST) and
process for 20 minutes.
Pack in KERR (the name is printed in capitals throughout the entire
cookbook, just in case you forgot which jar brand is the BEST) and
process for 20 minutes.
So my afternoon culminated in seven 8oz jars of alien guts. Luckily this batch will, in fact, last an entire year. :) I enjoy trying some of the more "exotic" recipes that have gotten lost over the years. By the way, Wild Kat makes an awesome jalapeno pepper jam! So what's up next? Maybe watermelon rind preserves? Or crab apple catsup? Never know what delightful things will come out of that KERR book!


Recipe:
11 cups green tomatoes
8 cups sugar
2 whole lemons
Chop the tomatoes into cubes, cover with hot water and boil for 5 minutes. Drain, add sugar and let sit for at least 3 hours.


 |
| yes, that's my Sunbeam collection in the back |
So my afternoon culminated in seven 8oz jars of alien guts. Luckily this batch will, in fact, last an entire year. :) I enjoy trying some of the more "exotic" recipes that have gotten lost over the years. By the way, Wild Kat makes an awesome jalapeno pepper jam! So what's up next? Maybe watermelon rind preserves? Or crab apple catsup? Never know what delightful things will come out of that KERR book!

Friday, August 26, 2011
Book Review : LOOK and COOK
This past year for her birthday, my daughter received a children's cookbook from my mother. Mom always cooked and baked from scratch when I was growing up. And I think she's determined that my daughter know a pastry cutter when she sees one. Or an egg beater. Or a flour sifter. Tools of the trade that have fallen out of favor in the past years.
 LOOK and COOK: A Cookbook for Children, by Tina Davis, is perfect for the retro-housewife whose children show an interest in her daily kitchen routine. The hardcover, spiral bound, 8x11" book is a delight for the eyes on every page. The colorful illustrations range from classic 1930s silhouettes to kitschy '60s dancing hotdogs.


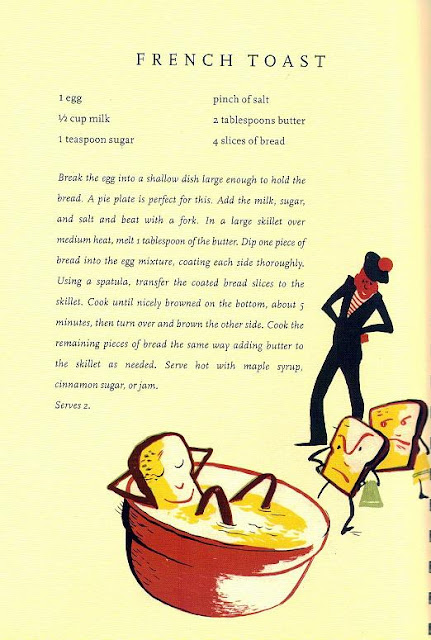


And yes, there are three pages of kitchen tools so children can identify what is that they are using.
There are pages on kitchen safety.
Also several easy-to-read pages on measurements.
No children's cookbook would be worth its salt if it didn't include the old stand-by favorite recipes of macaroni and cheese, spaghetti, chocolate chip cookies, chicken noodle soup and blueberry muffins. This book hits all the big ones. You know, those dishes that your children request every time you foolishly ask them, "What should I make for dinner tonight?" (as if they'll have some brilliant idea that you haven't thought of yet).


Even Mamie Eisenhower's fudge recipe is included to remind you that this isn't your typical cookbook!
Aside from the classic recipes, possibly my favorite part of the book includes pages on how to set the table. Teaching young children this simple skill is something that isn't as commonplace as you might think. It reinforces children's understanding of left and right, and builds a foundation for table manners.
I highly recommend this book for children ages 6 and up. The fun illustrations will grab their attention (and hopefully hold it long enough to get all ingredients into the bowl), and the recipes will satisfy their tummies even as they get old enough to cook on their own. And...I've been known to pull this one off the shelf, too. Sometimes it's just more fun to mix waffles for the umpteenth time when you can look at that row of dancing can-can eggs!
Subscribe to:
Posts (Atom)